This article shows how you can use Google Maps as a visual 3D reference in a visTABLE® factory layout. Normally you can only save 2D images from Google Maps with the snipping tool or use the image export function in Google Earth. However, there is another way to create a 3D model. In principle, this would allow a factory layout to be mapped more realistically in the context of the respective environment. And that is the purpose of this article.
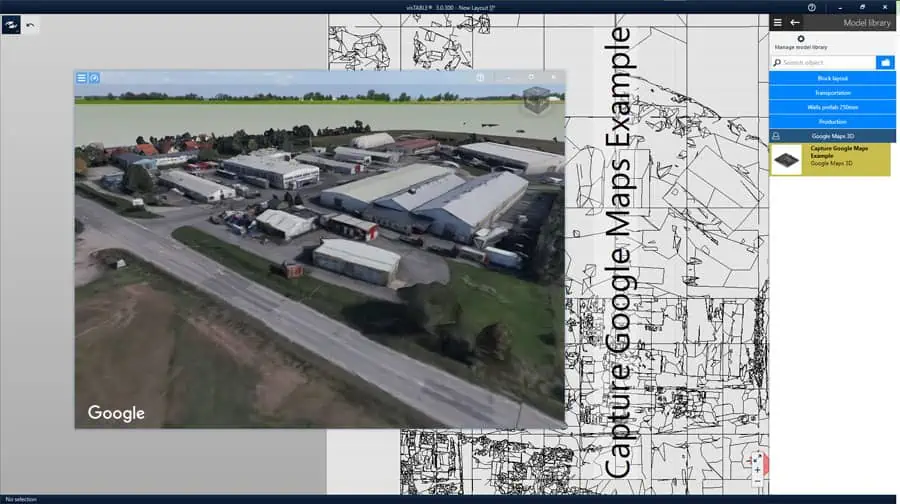
In addition to Microsoft Windows, visTABLE® and Google Chrome, you will need three special tools which are listed below and which are freely available for downloading.
Two important things first:
1. Please note the terms of use for the use of Google Maps imagery. All examples shown in the article were created for test purposes and use fictitious example layouts in conjunction with Google Maps. The following links provide further information:
Additional Terms of Use for Google Maps/Google Earth
2. This is an experimental solution, as Google itself does not offer an official option for exporting 3D models. The capture does not always work reliably. You can find out about the limitations and possibilities in the following sections. The resulting 3D models can often be quite rough and can be used as a backdrop at most. If you need more precise terrain and building data, you are dependent on other services such as laser scanning for this reason alone.
I also refer to an existing video tutorial, which shows the step-by-step procedure up to the Google Maps 3D reference in Blender. You will also find additional information on possible problems and corresponding solutions in the respective sections. Still ready to try it out?
Step 1: Installing the software and preparing for the 3D capture
I recommend the video tutorial from GIS Solutions, but with the following, more up-to-date versions of the tools used:
- Maps Models Importer v0.6.2 (add-on for Blender)
- Blender 3.41
- RenderDoc 1.25 (64-bit)
This information can also be found directly on Élie Michel’s GitHub page. By the time you read this, there may already be an updated version of the “Maps Models Importer” with other recommended software versions. Once everything is installed and set up, you can proceed to the next step.
Step 2: Capturing a map section as a 3D model for Blender
Tip 1: What to do with seemingly empty RDC files?
If the import of the generated RenderDoc file (.rdc) in Blender does not produce a result, the capture probably did not work properly. This seems to be strongly dependent on the zoom level set and the viewing angle in Google Maps. The only thing that helps here is to try several times until you get a usable result. In minute 8:25, the video also discusses the procedure for recording. This is relatively easy to recognize by the file size of the capture in RenderDoc. If the RDC files are only 15-20 MByte in size, the capture usually did not work. With a size of 60-80 MB there is a good chance of obtaining a 3D model in Blender.
Tip 2: Don’t capture areas that are too large:
Don’t aim the camera perspective too flat. The horizon or very distant areas should not be visible in the image section. A rather steep oblique perspective is better. This way, only the desired area is captured and no 3D models with very large external dimensions are created.

Step 3: Blender export of the 3D model for visTABLE®
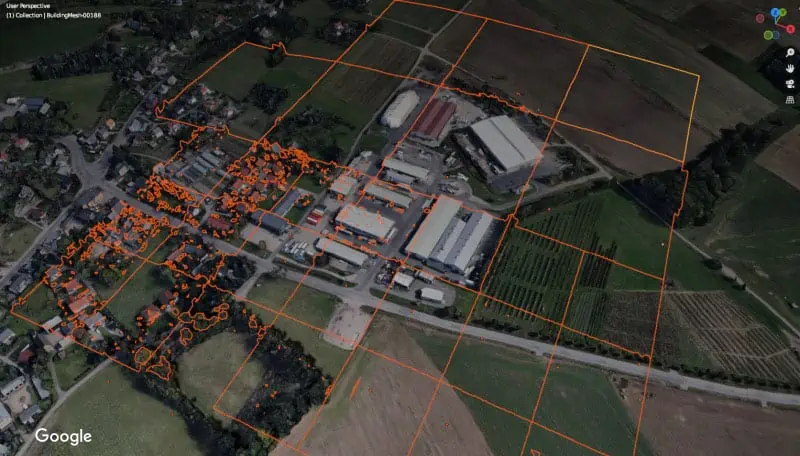
Before exporting, check whether only the required objects or areas are present in the 3D model. Everything else can be selected and deleted. As Google Maps divides the map into photorealistic 3D tiles, these can be easily deleted. In Blender, the 3D tiles can be selected with the left mouse button and can be deleted with DEL. Multiple selection is possible by holding down the SHIFT key. The selection can also be reversed with CTRL+I in Blender. After cleaning up, check the scaling of your 3D model.
The correct scaling of the model
Please note that the resulting 3D model does not yet have the correct model scaling. This can be determined and set using a reference dimension directly in Blender or subsequently in visTABLE®. You can obtain a reference dimension in Google Maps using the “Measure” function. To do this, move the mouse pointer over the “Layers” menu, which is displayed as a square symbol at the bottom left of the map. Click on it, then on “More” and then on “Measure”. Now you can define a measuring section with two points. Of course, the measurement area must also be included in the captured 3D model, as this will be measured in Blender in the next step. This could be the length of a hall aisle, for example.
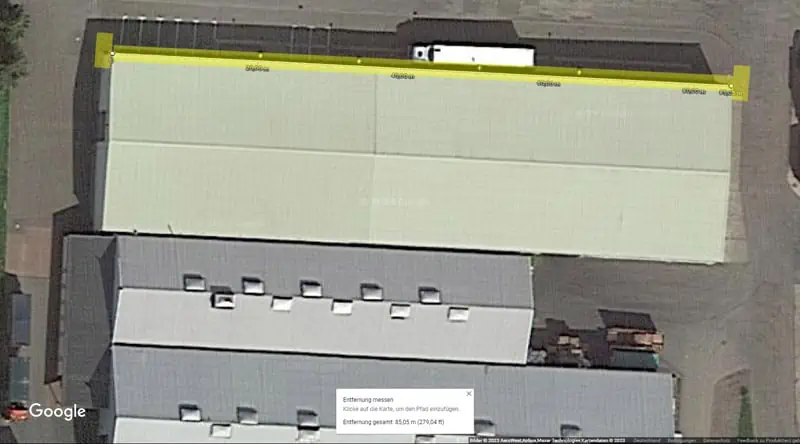
Choose as long a distance as possible in order to compensate as well as possible for measurement inaccuracies when calculating the scaling factor later on. Make a note of the reference dimension taken and now measure the same distance in the 3D model in Blender. The Measure tool in Blender is available for this purpose. The function is also explained in the following video.
Now determine the scaling factor from the two values:
Reference dimension : Actual dimension = Scaling factor
Make sure to calculate the scaling factor with the same units of length. We need the determined scaling factor in the next step when exporting.
To load the 3D model created in Blender into visTABLE®, the following 3 steps are necessary:
1. export the file as Wavefront OBJ
2. import the saved OBJ file in the ObjectManager
3. place the 3D model in visTABLE®
Following the procedure in more detail:
1. Export OBJ for visTABLE®
In Blender, select “File” -> “Export” -> Wavefront (.obj). In the “Scale” field, enter the calculated scaling factor (48.62 for example) and confirm the export with “Export Wavefront OBJ”.

Your scaling factor may differ from what is shown in the example above.
2. Import OBJ in the visTABLE® ObjectManager
- Open the visTABLE® ObjectManager and either select an existing catalog or create a new catalog.
- With the catalog selected, press “Import models/catalogs”.
- Select the OBJ file previously exported from RenderDoc and press “Open”.
- In the “Check alignment” dialog, select a suitable alignment and press “Next”.
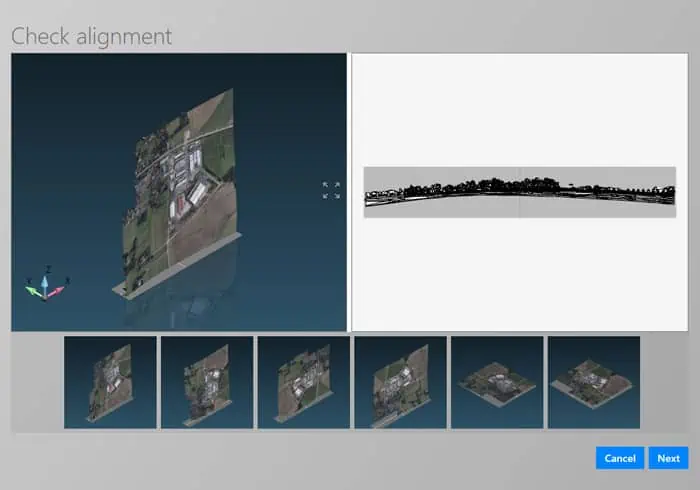
- The model dimensions should already be correct in the following dialog. If not, the scaling can also be adjusted here.
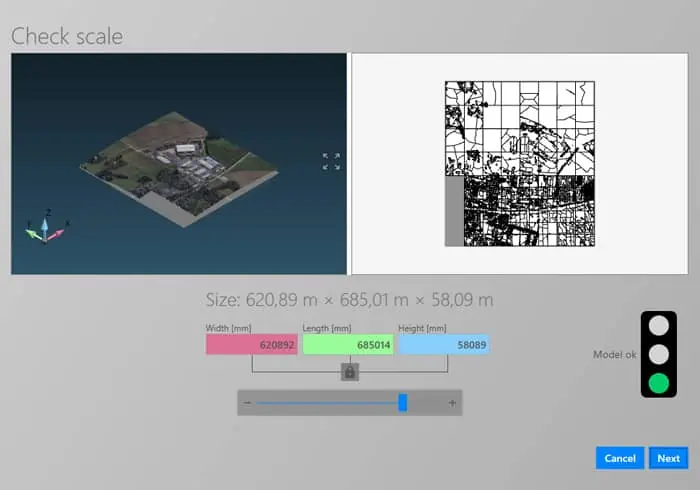
- Press “Next” and confirm the warning message that may appear with “Yes” and then confirm with “Finish import”.
The processing of the 2D derivation may take some time, so be patient. As soon as the catalog view with the imported object is visible again in the ObjectManager, the program can be closed.
3. Placing the Google Maps 3D reference in visTABLE®
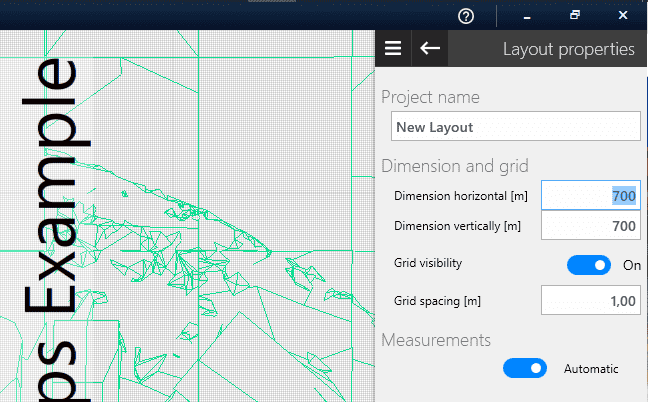
- Start visTABLE® and the 3D view. Drag the generated 3D model from the corresponding catalog into the layout. The layout size may need to be adjusted. In my example used here, a layout size of 700x700m was used because the Google Maps reference was 620x685m.
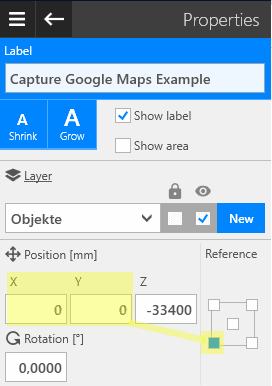
If the Google Maps 3D reference is to be placed at the origin of the layout it can be done via Properties. The following dialog shows the right settings and values.
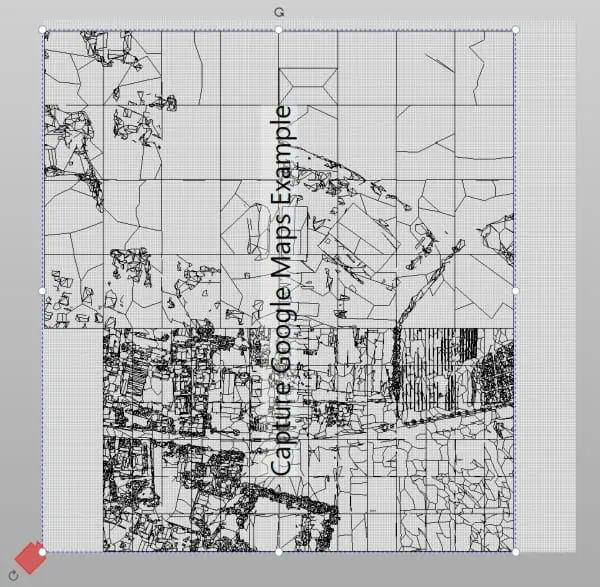
This results in the following position of the Google Maps 3D reference.
Height adjustment of the Google Maps 3D reference
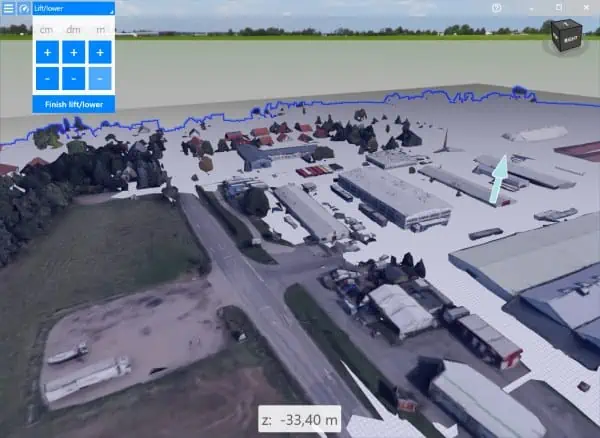
If you want to set a specific area of the Google Maps reference to zero height, the interactive Lift/Lower function will help. Select the Google Maps 3D reference and move the model via “Lift/Lower” in the 3D view until it is at the correct height for your factory layout. Please note that you can also use numerical values for Z in the Properties.
Now it is possible to mix a factory layout with a Google Maps 3D reference.
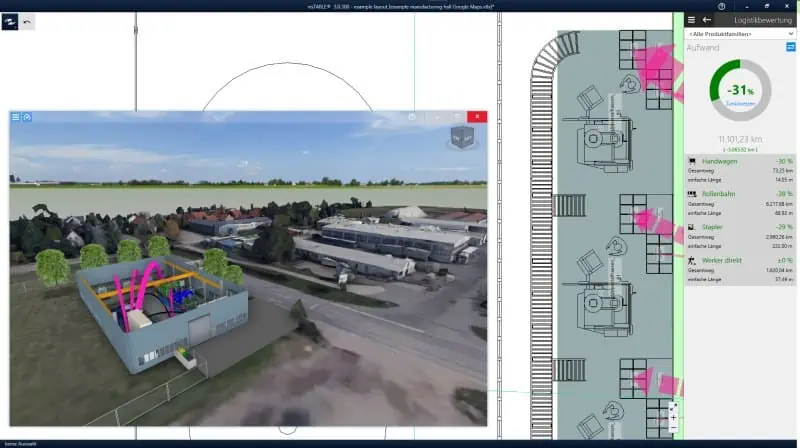
If the reference is no longer required, it can either be deleted or shown or hidden via layers.
Optional Blender export for editing in 3ds Max
Do you prefer to work with 3ds Max and want to edit the 3D model here? Then data exchange using FBX format is a good option. The prerequisite is that the RDC file has already been imported into Blender, as described in step 2 above.
1. Export the 3D model as an FBX file from Blender: File -> Export -> FBX (.fbx).
2. Then import the FBX file into 3ds Max with the standard FBX profile.
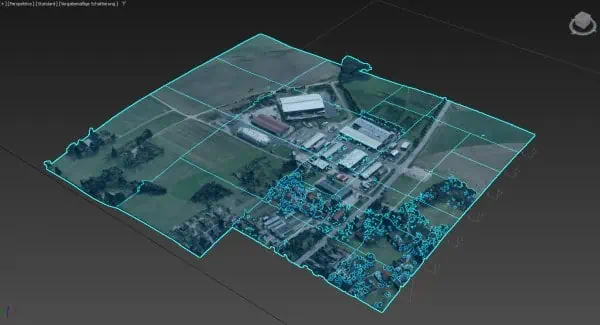
Now you can make all the necessary adjustments and then export the 3D model as OBJ for visTABLE®. Of course, data exchange via FBX also works with other DCC applications such as Maya, Rhino or Cinema4D.
Final Note
Despite the fact that there is currently no official and easy way to use Google Maps 3D references in a visTABLE® factory layout, it could be useful for factory visualization. But remember, many rural or undeveloped areas in particular are usually only very low-resolution 3D maps and so can only be used as a rough backdrop, which is ultimately what should be shown here.
Hopefully Google will provide a service sometime in the future. That should allow to use their 3D imagery on demand in third-party applications in an more easier to use way. At the moment it remains an experimental “What if?” solution to try out.
Google does offer advanced services with higher quality assets for certain POI such as their Google Maps Platform. But these focus more on navigation and 3D visualization on the platform itself and are not designed for 3D data exchange with all possible third-party applications.
Another interesting service is Mapbox. Mapbox is a mapping and location cloud platform for developers and provides a Raster Tiles API for accessing satellite imagery tilesets generated from raster data.
further articles on that topic:
